Tuesday, November 29, 2016

Winter Beverage Station

This post contains an affiliate link.

I am so ready to celebrate the Christmas season and I have promised myself that I will take time to celebrate a little every day, in spite of all of the busyness! To kick off the season I am joining 7 other blogging friends for the Reindeer Recipes blog tour. If you have arrived from Clutter Cafe, welcome, and I hope you will browse around while you are here.

TT_RR

Be sure to visit the other stops on the tour too.

Today I’m sharing our winter beverage station. We enjoy a great cup of hot chocolate during the winter months and especially while we are decorating the Christmas tree.

winter beverage station

Supplies are on the counter and ready for use.

hot chocolate santa

Hot chocolate mix is kept in a Santa bottle.

marshmallow snowman

Miniature marshmallows are in a snowman bottle.

electric frother

Last year we made an addition to the beverage station. We added this electric milk frother. We use the frother for making hot chocolate and it is wonderful! It tastes just like hot chocolate from America’s favorite coffee shop for a fraction of the cost!

Our milk frother is no longer available from Williams Sonoma but this one is similar and has good reviews. Give it a try. I’ll bet you will like it.

The next stop on the tour is Brittany's Pantry. Be sure to follow the link over to Brittany’s blog to see the recipe she has for us today.

By all means, be sure to take time to celebrate the season!

a signature

The full Reindeer Recipes tour lineup is linked below:

Positively Southern

Confetti Style

M Jones Style

Swirls of Flavor

Clutter Cafe

Life At Lydias House

Brittany's Pantry

Totally Tailgates


Sunday, November 27, 2016

Quick Update

I hope that everyone had a wonderful Thanksgiving. I certainly did. After all of the cooking, feasting, visiting, and cleaning, I am ready to move on to Christmas. My decorating gigs are well underway and I hope to start at home in a couple of days. For the next 3 Tuesdays I will be participating in a blog hop and I hope you will come back and visit.

Reindeer-Recipes-Graphic

See you Tuesday!

a signature

Monday, September 12, 2016

New Life for Another Old Chair

This post contains affiliate links. By purchasing through the links I make a small commission at no extra charge to you.

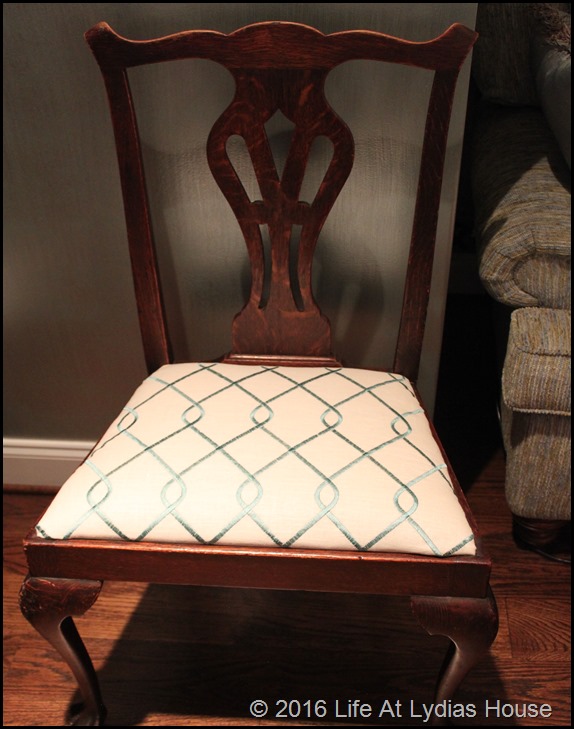
I love giving new life to something old. I just reupholstered this old chair for my mother to use in her bathroom.

pagoda chair

pagoda chair back 2

I love a cute pagoda and I love the fabric that I used on the back of this chair. I chose to use a solid textured blue fabric for the seat. Let’s take a look at what it looked like before.

pagoda chair before (front)

I found this chair in a second hand store for $35. That’s a little more than I usually pay for a single chair but it was in very sturdy condition and I knew it was perfect for my mom’s room.

pagoda chairbefore (back)

upholstery staple remover

There is a reason why upholsterers charge so much money. It is because it takes a long time to remove all of those darn staples!! I used this staple remover to speed things along. It really is a great tool to have. I’m thinking that if you are taking something to be reupholstered if you took the time to remove the staples first it should be much less pricey since taking the old stuff off is the most time consuming part of the project. You can get this one  from Amazon for about $10 and it is worth every dime! It is eligible for Amazon Prime shipping.

bulging chair springs

It was hard to get a good picture of the bottom of the chair but I removed the cover from the bottom to work on the springs that had come untied and were bulging out the bottom.

retied springs

This looks a little better after I retied the springs. I didn’t do anything to the finish of the wood since I like its aged character.

chair frame ready for new fabric

I kept all of the original stuffing including the old springs and horse hair. After a little work and vacuuming up all of the dirt and dust it was ready for the new fabric. I don’t have a picture but I ALWAYS use this pneumatic stapler, also eligible for Amazon Prime and well worth the $30. I have tried many times to use a heavy duty hand stapler and I can never get the staples all the way into the heavy wood frames. I use the stapler with this pancake compressor and I have been very happy with the results I get. All of those tools can be purchased for about $100 total so if you use them one time they are paid for!

pagoda chair front view 2

Once all of the preparation was done, putting the new fabric on was very quick. Gluing the trim around the edges to cover the staples was a little time consuming and tricky.

pagoda chair front

The fabric is Ming Pagoda by P Kaufmann in the Zephyr color. The solid blue fabric was picked up on a remnant table so I don’t have the name of it. I already had the gimp trim left from another project.

pagoda chair back

I love the way it turned out.

pagoda chair back 3

pagoda chair front view

If you are interested in seeing some of my other chair rescues click on any of the photos below to see the post related to that chair.

PicMonkey Collage red chairs 2

oak chair 17

cane back chairs 10

painted dining chair 2

recovered swivel rocker

Occasional chair -rocker candidate

new home for old chair with cane replaced

new red chair 2

Mackenzie Childs table and chairs 1

new chair 1

IMG_2631


Thanks for reading and a BIG thank you to those who take time to leave a comment!

a signature

I’m linking to Metamorphosis Monday, to Wow Us Wednesday, to Grace at Home, to Thoughts of Home On Thursday, to Before and After Wednesday, and to Anything Blue Friday. Be sure to click the link for lots of inspiration.

Tuesday, September 6, 2016

Garden Tour of Moss Mountain Farm Part 4

This is the last post of my garden tour of Moss Mountain farm.

across the back of the house toward the east lawn

My pictures don’t come close to doing the garden justice.

moss mountain farm aerial view labeled copy

To help visualize the layout of this large area, I have added some labels to the aerial view photo that I found online.

view of the screened porches

The view above is coming around to the back of the house as you pass by the kitchen.

foundation plantings at the basement door

This is the entrance to the basement in the photo above.

view toward the art studio

The art studio is on the east side of the croquet lawn directly behind the house.

croquet lawn and summer kitchen

The summer kitchen is on the west side of the croquet lawn. We were told that there is a 2000 gallon cistern beneath the croquet lawn that holds water used for irrigation.

boxwood foundation plantings around the summer kitchen

fireplace and outdoor kitchen outside the summer kitchen

This outdoor kitchen is outside the summer kitchen.

fireplace outside the art studio

There is also an outdoor fireplace outisde the art studio.

holly hedge with beveled edge pruning

More hedges were used as garden walls dividing the garden into smaller spaces.

holly hedge

Someone on the tour asked about the appearance that the hedges are trimmed on a bevel getting wider at the bottom and narrower at the top. We were told that this method of trimming keeps the bottom of the hedges from being shaded and getting “leggy” looking. These hedges certainly have a uniform full look all the way to the ground.

lower garden beds 1

espaliered pear trees 1

There were more espaliered pear trees in the parterre gardens.

espaliered pear trees 2

lower garden beds 2

lower garden

window in the hedge wall 2

This was a cute little porthole in one of the hedge walls.

window in the hedge wall 3

You can peep through to see the view down to the river.

window in the hedge wall

view toward the river

The photo above looks down through the blue and white garden to the river.

blue and white garden 2

The blue and white garden is on the lower parterre and has a small fish pond with containers filled with a variety of white plants. The four corners of this garden are Vitex trees.

blue and white garden 1

blue and white garden fish pond

vitex tree in blue and white garden

We were told that the Vitex trees like hot dry weather. They seemed to be thriving very well in this spot.

vitex tree close up

The photo above is a close up of the Vitex tree. It has purple/blue spike blooms.

blue and white garden view toward the house

The last photo is the view back up to the house from the blue and white garden.

I do hope that you have enjoyed the tours. If you missed any of the posts you can see Garden Tour Part One here, Garden Tour Part Two here, and Garden Tour Part Three here.  You can see the tour of the Garden Home here.  If you ever have the opportunity to visit Moss Mountain Farm near Little Rock, Arkansas, I would highly recommend it. We enjoyed every minute of our visit there!

a signature

I’m linking to Wow Us Wednesday, to Grace at Home, and to Thoughts of Home. Be sure to click the links for lots of inspiration.