Monday, March 25, 2013

Spring Vignette

Years ago I decorated for a holiday almost every month but as my children have gotten older I now do well to change a few things around each season.  If I get it done it’s good and if I don’t get to it, that’s OK too. This year I was able to get something together for spring.

spring vignette 4

We have a large coffee table in our den so that we can prop our feet up! My family doesn’t cooperate with unrealistic styling so the “lived in” look is for real. The wooden box and the urn are almost always on the table. The topiary rabbit and small basket have been added for spring.

spring vignette 5

The remote should be in the wooden box but rarely finds its way there and the photographer failed to put it there before the photo shoot. The box also holds pens and notepads and other coffee table clutter.

rabbit topiary

I debated between this faux moss covered rabbit and a topiary rabbit but decided on this one thinking that it would last longer. I purchased it at Scott’s Antiques earlier this month.

spring vignette 8

The basket is holding vintage chocolate molds for Easter eggs. If you look closely, you can see the Man in the Moon on one on the left side.  I also purchased these at Scott’s and the dealer told me that she purchased these at an outdoor market in Belgium. Lucky her! Sounds like my kind of place!

spring vignette 3

The pansies are awfully droopy but hopefully will perk up again and last a few more weeks!

Now if we can just have some WARM spring weather!

I’ll be linking to Table Top Tuesday at A Stroll Thru Life. Click the link to see lots of inspiration.

a signature

Sunday, March 24, 2013

New Life for an Old Chair

I have several projects in process but I have managed to check a few off my long list. My project for last week was giving a makeover to an old chair. My sweet friend has asked me to help her prepare a nursery. She wanted an upholstered chair which rocks and swivels. We had been on the lookout for an affordable candidate. I happened to be in a thrift store one day when I spotted 4 possible candidates so I sent her a text to go there after work. She went and was able to purchase one at a very reasonable price. I gave her some fabric samples to show her the appropriate weight of fabric that she needed and she purchased a nice denim weight fabric for the chair. Because she chose stripes, it took a little more fabric than it would for a pattern that would not require a match in the upholstery.

IMG_7150

Let me show you what we started with. Step into my studio garage.

IMG_7111

Mauve upholstery velvet in all of her glory. A little worn but in very good shape. I won’t bore you with the details of the upholstery process but I did strip it down to the bare frame which was in excellent condition. My friend chose to leave off the tufting on the re-do.

IMG_7151

It turned out very well. Of course I forgot to take my camera when I delivered it to its new home. I hope to get pictures there since it coordinates with the room better than it does here in my den.

IMG_7152

It is my understanding that this chair has already been approved by grandmother as she spent a little time rocking and praying for her future grandchild! How precious is that! Thanks NP for letting me come alongside you on this journey!

I hope that you have a great week as we prepare for Easter!

a signature

I’ll be sharing with Metamorphosis Monday at Between Naps on the Porch and with Wow us Wednesday at Savvy Southern Style.


Tuesday, March 12, 2013

Fun in Philadelphia

It has been several weeks since I have posted because I have been traveling. I spent 3 of the last 4 weeks traveling, then had to take time to catch up on my homekeeping duties (laundry, bills, and other fun stuff!!) One of the places that I traveled to was Philadelphia. I had not been there before. I went with my daughter to attend a conference and we had a little time to do just a little bit of sightseeing. Philadelphia is a beautiful city. We have found that taking a tour gives us a lot of info in a short amount of time whenever we are on a tight schedule. We opted for the Big Bus tour as we have in other cities. It was FREEZING cold, 28 degrees, so our tour was in a heated trolley instead of an open top bus! We didn’t do a lot of hopping on and off nor did we do as much touring by foot like we usually do but we had a great time never the less. We were told on the tour that Philadelphia has more outdoor sculptures that any other city in the US.
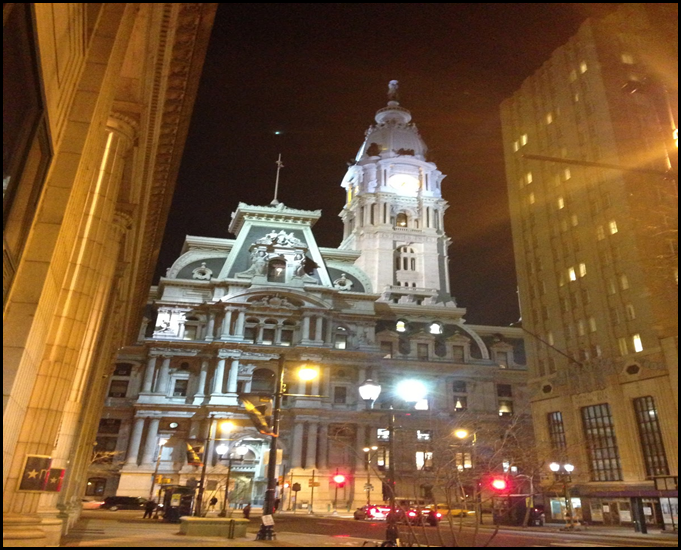
city hall at night

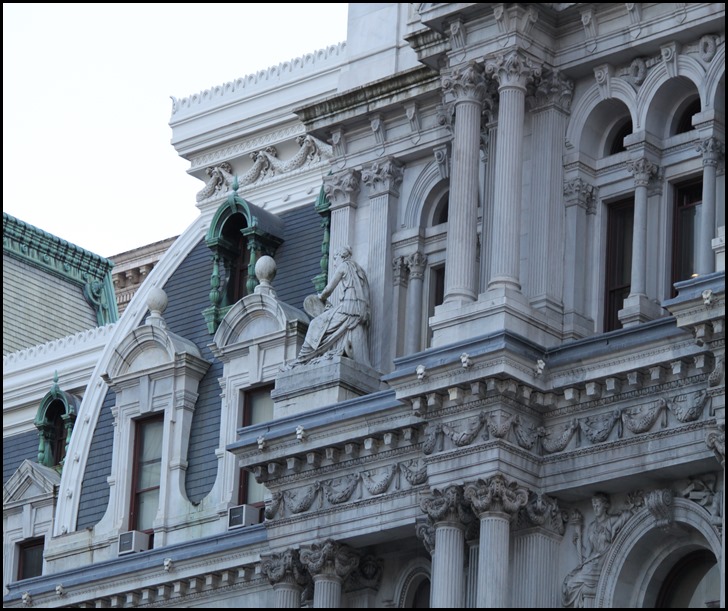
We stayed downtown just one block from the magnificent City Hall which is in the center of town! I love buildings and architecture and this City Hall is one of the most magnificent buildings I have ever seen!

city hall 5

A 30 foot statue of William Penn stands at the top!

city hall 7

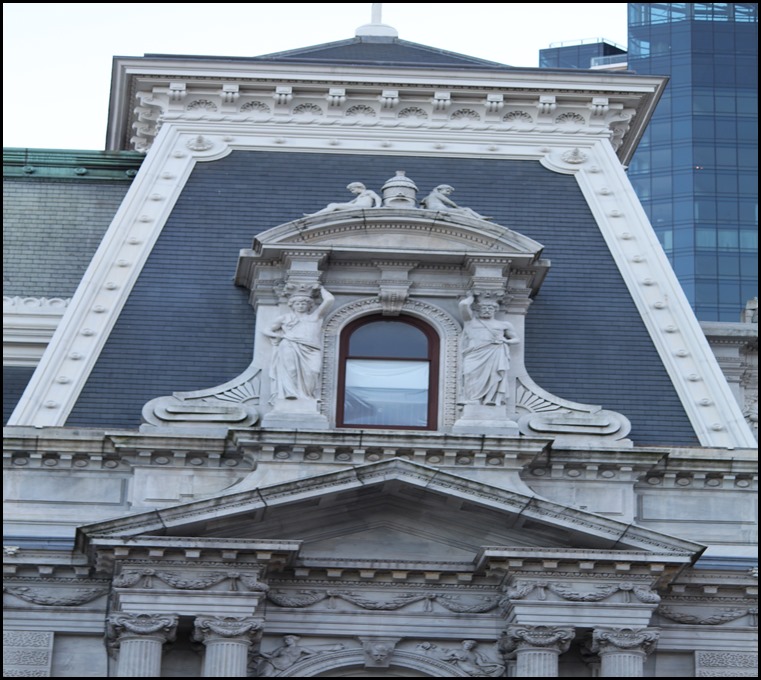
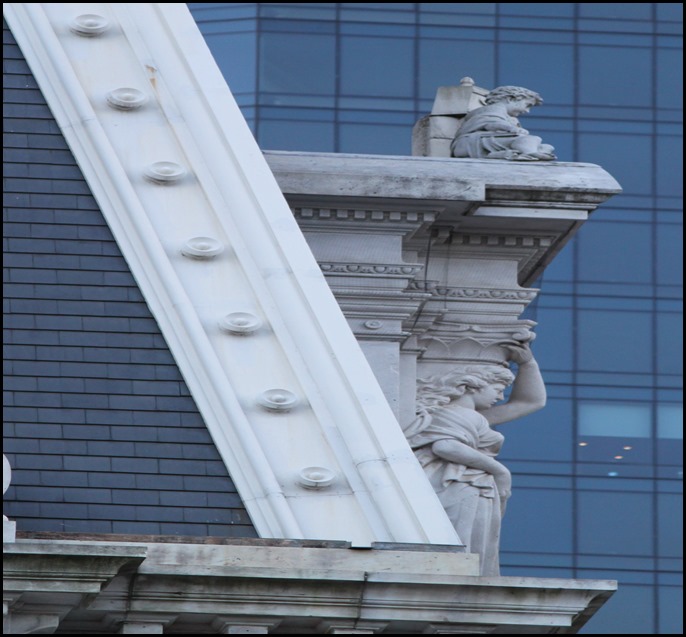
The statues and carvings around all of the windows and doors is just unbelievable!

city hall 8

city hall 9

city hall 10

city hall 11

city hall 12

city hall 14

Look at the little fellow on top of the pediment above! I would love to know the stories behind all of these figures!

Of course we also visited the Liberty Bell and Independence Hall. The city is so historic!
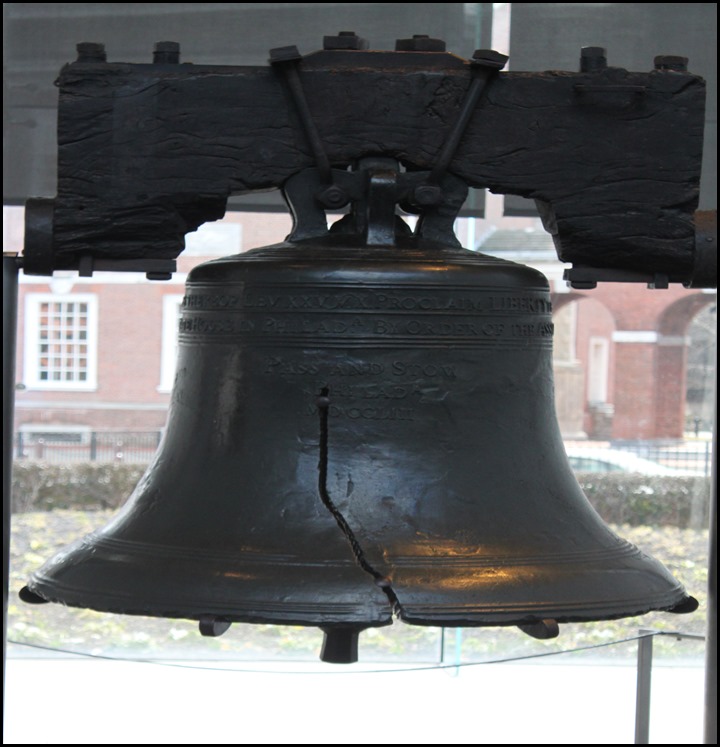
Liberty Bell

Independence Hall

IMG_6970

I am so thankful that these historic sights have been preserved. The conference that we attended was in the convention center which was being prepared for the Philadelphia Flower Show the following week!  It would have really been wonderful if we could have taken that in at the same time! Any time we visit a new city, I always purchase a travel book to read ahead of time so I’ll know what we just can’t miss! I am so glad that I read about Philadelphia or I would have missed a treat! I read that Macy’s in Philadelphia is the home of a wonderful pipe organ. Somehow I underestimated the grandeur of the organ! It has 28,842 pipes and is quite magnificent. It was built for the 1904 World’s Fair in St. Louis before being purchased and transported to Philadelphia. It has been thrilling shoppers every business day since 1911!!! It is in the center atrium of the store.
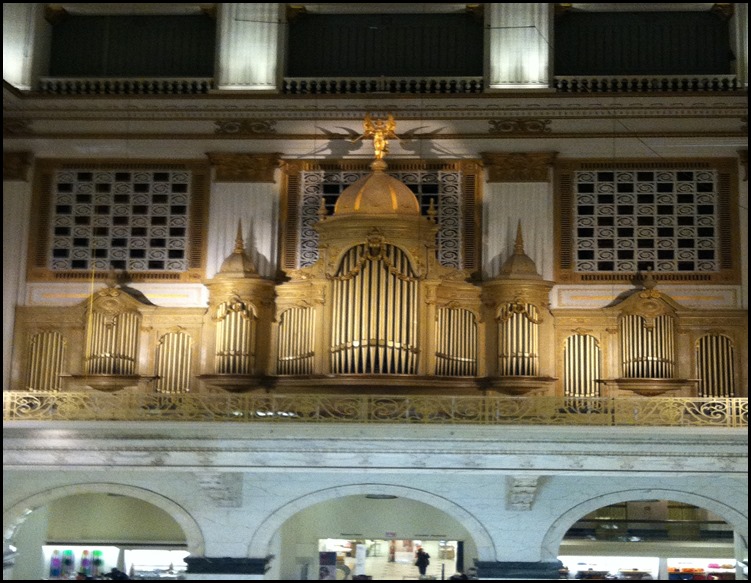
organ 4

An organist plays twice each day, Monday through Saturday. We were able to catch two of the mini concerts!

organ 3

Organ pipes are on each of those seven levels going up although the Macy’s store is only on three of the levels now.The console is just above the shoe department!

organ 1

At the end of the mini concerts, visitors are allowed to view the console.

organ 6

Of course, we took the opportunity to take cheesy photos!

I am delighted that Macy’s has maintained and preserved this magnificent organ. I am including a very short video so that you can hear it but you can find several other lengthy videos on YouTube to hear more!

We had a great time and would highly recommend a visit to Philadelphia, especially for any history lovers!

I still have several projects in the works but as you can imagine, I haven’t been at home long enough to work on them! I hope you’ll visit again to check my progress!

a signature

If you would like to read my daughter’s take on the trip, click here.

I’ll be linking to Wow Us Wednesday at Savvy Southern Style. Click over and visit for lots of inspiration!

Tuesday, February 19, 2013

An Upholstered Headboard from Grandma’s Piano

My daughter and I have finally completed another project using recycled parts from my grandma’s piano. We made an upholstered headboard for my daughter’s bed.

upholstered headboard 1

You may have seen the entry table for our summer cottage that I made earlier using some of the parts. You can read about it here.

entry table lamp

This is what we started with before disassembling!

IMG_4197

My son and I disassembled the entire piano! I think I may be able to get 10 projects out of this one piano!!

headboard frame 3

This is the part that we used. It is the top front area of the piano where the music sits.

headboard frame 5

The finish was very old and crackled.

headboard frame 9

Let’s take a closer look.

headboard frame 15

We used Citristrip to remove the finish.

headboard frame 10

We applied a nice thick coat and let it stand for a while to work its magic.

headboard frame 11

We then cleaned off the gunk to reveal a beautiful wood.

headboard frame 18

We then applied a quick and light coat of stain followed by a coat of satin finish polyurethane.

headboard frame 21

We cut legs from 1 x 3’s and attached them with screws. The legs will be painted the same color as the wall. I also cut a piece of 1/4 inch thick plywood to fit the opening and purchased a piece of 2 inch thick foam the same size.

headboard foam 1

The foam was covered with a piece of linen which was left over from another project and stapled on the back of the plywood.

headboard foam 3

I marked the back and drilled the holes for the tufting buttons then used a 5 inch long upholstery needle to attach covered buttons for the tufting. I always use floral wire to attach the buttons since I have had the thread to break so many times. The tufting is the most challenging part for me! I then used screws to attach the foam covered plywood from the back to the frame.

upholstered headboard 1

The tufting does not show up well in the photos.

upholstered headboard 3

upholstered headboard 5

You can see from the close-up shots that the wood turned out beautifully.

upholstered headboard 7

upholstered headboard 4

We were pleased with our efforts and are exciting about using it to update my daughter’s room.

I hope that you are enjoying the last few weeks of winter and are looking forward to spring as much as I am!

a signature

I’ll be linking to Wow Us Wednesday at Savvy Southern Style.

Monday, February 4, 2013

Painting a Rug

I am always one of the last to get on any decorating trend. I have been thinking about this one for a while and finally got on board after looking for a rug but not being able to find one. I needed a rug for the kitchen to catch water drips in front of the sink and those coming off of dishes going into the dishwasher.

stenciled rug 1

I started by drawing the shape that I wanted and then cut it out of copy paper.

rug stencil 1

Next, I traced this shape onto a file folder so that it would be stiff and used a an exacto knife to cut it out. Notice that I left a connector strip in the middle.

rug stencil 2

I decided to start in the center of the rug.

rug stencil 3

I didn’t even tape down the stencil. I just held it down with one hand and used a 3” foam roller to apply paint.

rug stencil 4

I went back and filled in the centers with an artist brush and quickly had a full row.

rug stencil 5

I then added a row on top and bottom.

rug stencil 6

Finally I went around the border with the foam roller.

stenciled rug 3

Pretty nice transformation for an inexpensive rug from Target and it eliminates a lot of water spots on the floor.

stenciled rug 2

I’ll be linking to Metamorphosis Monday at Between Naps on the Porch and to Wow Us Wednesday at Savvy Southern Style.

a signature