Wednesday, February 29, 2012

Farewell to Winter Tablescape

I put together this little tablescape as a farewell to winter.

IMG_3164

The cheerful colors brighten my day.

IMG_3166

The cute little snowman mugs were a gift from a family friend and are some of my favorite things!

IMG_3168

The mugs pair well with the cranberry plates and glasses that I purchased several years ago from a local gift shop.

IMG_3169

The square white plates were purchased at Homegoods.

IMG_3170

I have a weakness for vintage silver plated flatware. I can hardly walk past it without purchasing more.

IMG_3171 

IMG_3172

I have a nice collection of Remembrance by Rogers Brothers. The quilted placemats were ordered from Neiman Marcus several years ago.

IMG_3174

I used a single blooming orchid for the centerpiece.

IMG_3173

The tall orchid is elegant without obstructing conversation.

signatureandsidebar003-001-1

I’ll be linking to Tabletop Thursday at Between Naps on the Porch.

Tuesday, February 28, 2012

Creating a Faux Tray Ceiling

I recently stayed in a lovely hotel room that had a great faux tray ceiling. It was very well done.

faux tray ceiling

By using a very large crown molding with the addition of trim on the ceiling you have the illusion of a tray ceiling.The walls were a buttery cream color, the ceiling was a creamy white, and the crown was also a buttery cream several shades darker than the walls.

faux tray ceiling window wall

The addition of a 1 x 4 trim piece along the window wall brings the ceiling down and completes the look.

faux tray ceiling corner

Let’s take a closer look.

tray ceiling corner detail

The trim material attached to the ceiling was also 1x4 with mitered corners. It was painted a beautiful metallic gold.

faux tray ceiling corner detail on window wall

The extra large crown molding is approximately 6 inches wide and tall.

tray ceiling drapery detail

The drapes and plantation shutters were attached behind the lower trim piece on the window wall.

faux tray ceiling extra trim for drapes

My photos don’t do it justice. It was a great look.

signatureandsidebar003-001-1

I’ll be linking to Wow Us Wednesday at Savvy Southern Style and to Metamorphosis Monday at Between Naps On the Porch.

Tuesday, February 21, 2012

This Little Lamp of Mine

While I am in the middle of a major kitchen update project, I have to complete a few small projects along the way so that I can feel like I’m at least making some progress. This little lamp was one such project.

IMG_3153

It started out looking like this:

IMG_3116

It was a pretty quick and easy redo. I started by “pressing here” and removing this brass sleeve.

IMG_3126

Upon removing the brass cover, there are two screws holding the wires, one brass and one silver.

IMG_3125

Actually, one wire has ridges and the other is smooth. So, to make things easier for reconnecting later, I marked the wire to the silver screw with a sharpie. I put an “S” for silver.

IMG_3123

Loosen the screw and the wire slips right off. I then unscrewed the socket base and pulled the brass rod out the bottom of the lamp without pulling the wire out of the brass rod. Leaving the wire inside the long brass rod makes reassembly much easier.  I then proceeded to spray the inside of the glass with a light coat of water followed by many light coats of “looking glass” spray paint. Much like I did here. Then I painted the shade black and reassembled the lamp.

IMG_3128

You have to look closely to see the spots on this one. I’m going to go back and add more black to the shade.

IMG_3151

I like it but what I like most about it was the price tag!

IMG_3117

I’m all for an occasional splurge but I do love a bargain!

signatureandsidebar003-001-1

I’ll be linking to Wow Us Wednesday at Savvy Southern Style and to Metamorphosis Monday at Between Naps on the Porch.

Tuesday, February 14, 2012

Updated Pantry Doors

As I mentioned in my last post, I am slowly updating our 25 year old home. I can see baby steps of progress and it is pretty slow going. I recently completed my update of the pantry doors.

IMG_3133 

It was hard to get a good photo since our pantry is located in the small hallway coming in from the garage to the kitchen. You can see the “before” in the shot below.

IMG_3095

As you see in the photo above, the door is a louvered door that was stained. You can also see that the carpet is in the process of being removed from this area. Here is another “before” shot looking toward the back door.

IMG_3094

If you look very closely, you can also see that I am in progress of changing all of the trim from stained to white.

To update the pantry doors, I cut 1/4 inch thick plywood panels to fit over the louvers. There is a little groove that holds it there. Then I added a very small trim to hold those panels securely.I also added those panels on the inside of the doors but did not put the chalkboard paint on the inside.

IMG_3134

The photo below shows the “after” shot looking toward the back door.

IMG_3136

The new flooring has been finished and work continues on the kitchen.

I’ll be linking to Wow Us Wednesday at Savvy Southern Style and to Metamorphosis Monday at Between Naps on the Porch.

Have a great week!

signatureandsidebar003-001-1

Monday, February 6, 2012

Updated Lamp Tables

I am sssllllloooooowwwwwllllyyyy  updating our 25 year old home and I can only see baby steps of progress. Everything always takes longer than I thought because usually one small task leads to another along the way. I was recently able to update my living room lamp tables.

IMG_3113

Before, I simply had an inexpensive table with a skirt.

living room table before

Of coarse, I can’t fine my “before” pictures of the new table, but I found it in an antique store booth that was having a good sale for $40. I did have to do a quick refinishing but that project was pretty quick, easy, and painless.

IMG_3111

I do have photos of the brass feet before I cleaned them.

l r table feet before 2

The difference is quite dramatic. I used one of my favorite products that I may have mentioned before.

l r table feet before 1

I used Wenol metal polish that I purchased on Amazon. It can be used on all metals, including my sterling flatware, and it is my go to for tough metal cleaning. With a little patience, and a lot of elbow grease, it usually meets my expectations.

IMG_3112

So far, I am liking the new look, minus the exposed lamp cord.

IMG_3110

I am also replacing the lamps. Stay tuned for more updates!

I will be linking to Metamorphosis Monday at Between Naps on the Porch and to Wow Us Wednesday at Savvy Southern Style.

signatureandsidebar003-001-1

Sunday, January 22, 2012

Powder Room Update

I recently updated this powder room. The wallpaper was hung 25 years ago when the house was built so it was due for an update. It was very difficult to take photos of the room because it is only 3 feet by 5 feet.
IMG_1917
Framed botanical prints provided interest on one wall.
IMG_1918
The frameless mirror installed by the builder was replaced several years ago by a framed mirror.
IMG_1920
The fixtures and the brass faucet and towel bar stayed. They are heavy duty solid brass and still in good condition. Never one to jump on to trends, I have not bought into the “anti-brass” trend in the blogosphere. I have stayed in some wonderful hotels in this country and abroad that had original brass fixtures and I loved them. In my opinion, the quality of the brass should dictate whether or not it needs to be changed.
IMG_2553
The old wallpaper was removed and replaced by this Thibaut pattern. The name of the pattern is Royal and it is in the Artisan collection. The color is Metallic Pewter. I was very pleased with the quality of the Thibaut paper. It was an excellent weight and was reasonably easy to hang. A sunburst mirror was purchased and hung above the toilet to replace the bird cage.
IMG_2554
Another vintage mirror was purchased and hung above the towel bar to replace the botanical prints. While there is still a lot of pattern on this paper, the large scale makes the room much less busy than the previous paper. This was not particularly a “budget” project. In spite of the tiny size of this room, the update cost was about $500.  However, if it lasts 25 more years, the cost will be a very affordable $20 per year! Now that is a budget update!
signatureandsidebar003-001-1
I will be linking to Metamorphosis Monday at Between Naps on the Porch and to Wow Us Wednesday at Savvy Southern Style.

Sunday, January 15, 2012

What Not To Buy!


The first item on my project list for 2012 is updating my kitchen and I have gotten started. I will be doing a full post when the job is more complete. As part of the update, I am switching from a countertop microwave oven to an over the range microwave. My current microwave/convection takes up a lot of counter space and the range hood was in dire need or replacement.

IMG_3082

Because I keep things a looonnnggggg time, I wanted to make a good decision. I promptly paid for an online subscription to Consumer Reports to read the reviews. While I don’t need a lot of whistles and bangs I do need quiet operation because I use the microwave for much more that popcorn and reheating. I actually use it for cooking quite a bit. I purchased a GE over the range microwave for our summer cottage a couple of summers ago and was happy with that model. So, I looked up the number and checked Consumer Reports. The ratings were fine and the “noise of operation” was rated “very good!” I proceeded to purchase and install GE model JVM1540. Upon completion of installation I turned on the microwave to try it out. Much to my DISMAY, it was VERY LOUD!!!! It sounded like the vent fan was running on “high.”  Thinking that something was wrong, I sought help from the owner’s manual only to find out that the fan is on an automatic setting that operates whenever the microwave is in use! Excuse me, but I would like to be able to hear myself think while I am cooking. I was appalled at the noise and I am very disappointed in Consumer Reports.

IMG_3100

IMG_3101

Knowing that I could not live with this noise issue for the next 10 years, the hub and I proceeded to uninstall the microwave and box everything back up in its original packing material and drive back to HHGregg where we had purchased it. Customer service at HHGregg was great. They were very sorry that I was not happy with my purchase and promptly issued a refund, no questions asked. Next, I went to the telephone directory and started calling stores that sold appliances. I told each one that I was looking for a microwave but wanted to hear it run before I made a purchase. One of the other local big box stores was of absolutely NO help. The salesman told me that none of them were hooked up and that all of them made a lot of noise and that I would not be able to find a quiet model. Not to be deterred, I continued to call. I called a locally owned furniture/appliance store and explained my dilemma. The salesman quickly told me that his microwaves were not hooked up but that he would be happy to get an extension cord and plug one in so that I could hear it. Now that is customer service. We drove to the store and he had the extension cord waiting! It took me less than 30 seconds to make  a decision.

IMG_3103

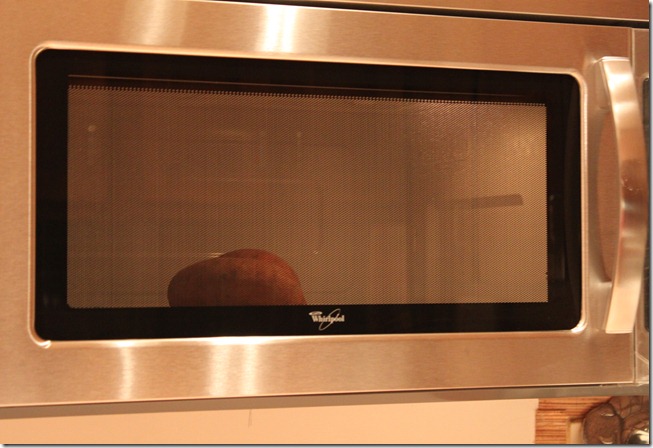
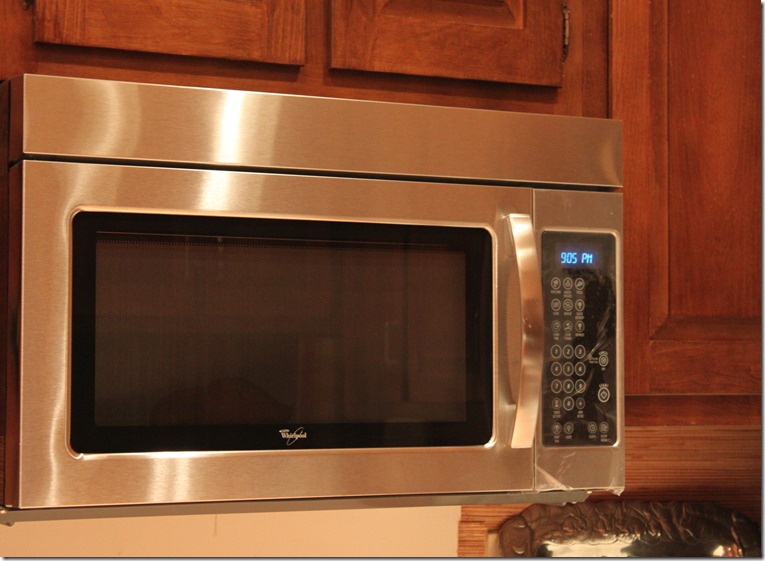
I chose Whirlpool model WMH1163XVS and I could not be more pleased. The Consumer Reports rating for this model is only “Good” but I beg to differ. The difference in this model and the GE model is night and day. In fact, this Whirlpool model runs more quietly than my expensive countertop model.
IMG_3104

It does not have a rack or a probe but I have never used those features in my current model. Just in case you are wondering, that is a sweet potato for the test run.

IMG_3105

I am so glad that we did not have to pay someone for installation then have to pay for uninstallation for a purchase that I was not happy with.
IMG_3107

Now I am a happy camper cooker!

I was not paid to write this post LOL!! ALL opinions expressed here are mine alone!

signatureandsidebar003-001-1

I will be linking to Metamorphosis Monday at Between Naps on the Porch and to Wow Us Wednesdays at Savvy Southern Style.